If you’ve ever walked past a wastewater treatment plant at 2 a.m. and heard that low, throaty whine, or stood in a food processing facility where grain is being pneumatically conveyed at breakneck speed, you’ve likely heard a high-pressure blower working. At our company, we spend most days troubleshooting these workhorses—our clients call when their blower isn’t performing as expected, and more often than not, the issue boils down to one thing: improper air volume adjustment. High-pressure Blower

A few weeks back, a maintenance manager at a mid-sized automotive parts plant reached out panicking. Their high-pressure blower, used to clear metal shavings from assembly lines, was blowing so hard it was shifting small components off the worktables, and cranking it down left gaps where shavings clogged critical machinery. He’d tried twisting a valve a few times, but couldn’t get it right, and was worried he’d damage the blower if he messed with it too much. This story isn’t unique. Precision adjusting a high-pressure blower’s air volume isn’t just about twisting a valve randomly—it’s about understanding how these machines work, what factors affect their output, and following a step-by-step process that keeps them efficient, safe, and long-lasting.
First, let’s get clear on what a high-pressure blower is, and why adjusting its volume is so critical. Unlike low-pressure fans, which move large volumes of air at less than 1 psi, high-pressure blowers (also called centrifugal or positive displacement blowers, though centrifugal are far more common for precise volume control) move air at 1 to 15 psi, making them ideal for applications where you need enough force to push air through long pipes, lift heavy materials, or overcome resistance in a process. The air volume here isn’t just a number—it directly impacts energy costs, process efficiency, equipment lifespan, and even safety. Too much volume, and you’re wasting power on air you don’t need, straining the motor, and risking process disruptions (like that metal shavings plant). Too little, and you get bottlenecks, increased downtime, and premature wear from overworking the blower to compensate.
The biggest mistake we see new operators make is assuming adjusting air volume is as simple as turning a valve. But before you touch any part of the blower, you need to ground yourself in the basics of its system. Every high-pressure blower setup has three key components that determine air volume: the blower itself, the piping network it’s connected to, and the load (the process it’s serving, like a pneumatic conveyor or aeration tank). Change any one of these, and the blower’s output changes too. For example, if you add a new section of pipe to your pneumatic conveyor, the resistance to air flow goes up, so your blower’s natural volume will drop unless you adjust it to compensate.
That’s why our first rule for precise adjustment is: do your homework before you touch a single control. First, pull your blower’s performance curve—this is the manual or digital chart that comes with every high-pressure blower (and if you bought one from us, we provide a digital copy with real-time calibration data for your specific unit). The curve plots air volume (measured in cubic feet per minute, or CFM) on one axis and pressure (in psi or inches of water column, a common metric for blowers) on the other, and shows how the blower performs at different speeds and throttle settings. It also marks the “sweet spot”—the range of CFM where the blower runs at maximum efficiency, with the least energy use and the least strain on its internal parts.
Next, you need to define your actual required air volume. This isn’t a guess—look at your process specs. For a wastewater aeration system, that might be based on the number of pounds of biological oxygen demand (BOD) you need to break down, given in CFM per 1,000 gallons of tank volume. For a grain conveyor, it’s the CFM needed to lift a specific amount of grain per hour, based on pipe diameter and length. Write this number down, and cross-reference it with your blower’s performance curve to see where it falls. If your required CFM is right in the efficient sweet spot, great—adjustment is mostly fine-tuning. If it’s too far off, you might need to look at changing the impeller size or motor speed, but that’s a bigger job we help clients with regularly.
Now, let’s get into the actual adjustment process, step by step—this is the part where most operators go wrong, because they skip the safety and pre-checks. First and foremost: lock out and tag out (LOTO) the blower’s power source. This is non-negotiable. I’ve seen too many technicians get hurt when a blower kicks on unexpectedly while they’re adjusting a valve. Even if you think the power is off, unplug it, hang a “Do Not Operate” tag on the breaker, and make sure no one can turn it on while you’re working.
Next, identify your blower’s control method, because that dictates how you adjust air volume. There are four common control types for high-pressure blowers, and each needs a different approach:
- Throttle Valve Control: This is the most basic, found on older or lower-cost blower setups. It’s a butterfly valve or gate valve on the discharge or suction side of the blower. Adjusting it changes the amount of air that can flow through the system.
- Variable Frequency Drive (VFD) Control: This is our go-to for precision, especially for modern setups. A VFD adjusts the motor’s speed, which directly changes how much air the blower moves—faster motor = more CFM, slower = less. It’s far more efficient than throttle valves because it doesn’t waste energy restricting air flow.
- Inlet Vane Control: Common on larger centrifugal blowers, this set of adjustable vanes at the blower’s inlet changes the amount of air entering the impeller, adjusting volume smoothly.
- Diaphragm Adjustment: Found on positive displacement blowers, where volume is fixed per revolution, so you adjust the size of the pumping chamber to change output.
Let’s start with adjusting a VFD-equipped blower, because this is the most precise method, and most of our clients use these now. Once you’ve done your LOTO checks, take a baseline measurement first. With the blower off, use a hot wire anemometer (a tool that measures air velocity) to test the CFM at the point where air enters your process, or use a pressure gauge on the discharge side to get your baseline pressure. Start the blower at its current setting, let it run for 10 minutes to stabilize—blowers perform differently when cold, so you need to wait for it to reach operating temperature before taking readings. Take three CFM measurements over that 10 minutes, average them, and note the pressure.
Now, compare that average to your required CFM. If you need less volume, lower the VFD speed by 5 Hz increments (for example, from 60 Hz to 55 Hz, which is common for 60 Hz power supplies). Wait another 10 minutes for the blower to stabilize, take three new CFM measurements, and average them. Don’t make big jumps—changing more than 5 Hz at a time will cause unstable flow, which can damage the impeller or motor. If you need more volume, increase the speed in 5 Hz increments, repeating the stabilization and measurement step each time. Stop when your average CFM is within 2-3% of your required volume—precision doesn’t mean perfect, it means staying within the range your process needs.
Now, if you have a throttle valve control (the old-school setup), the process is a bit different. For discharge throttle valves (most common), you’ll want to start with the valve fully open, then close it slightly in small 1/8 turn increments. Wait 10 minutes for stabilization, take CFM readings, and repeat until you hit your target. Never close the throttle valve completely—this will cause the pressure to spike, which can blow seals or damage the blower housing. If you find yourself needing to close the throttle more than halfway to hit your volume target, that’s a sign you should upgrade to a VFD, which is far more energy efficient and precise. For inlet throttle valves, you open or close the valve on the suction side of the blower, which is less stressful on the blower than discharge throttling, so it’s safer to adjust, but the same small increments rule applies.
Inlet vane control is another common setup for larger blowers. The inlet vanes usually have a scale marked from 0 (fully closed) to 100 (fully open). Adjust them in 10% increments, wait 10 minutes for stabilization, measure CFM, and tweak as needed. Again, don’t close them all the way—this can cause surging, a dangerous condition where air flow reverses inside the blower, leading to overheating and major damage. Surging is a big red flag, by the way—if you hear loud banging or vibration coming from the blower, shut it off immediately. It’s usually a sign you’ve adjusted the vanes too far, or your process load has changed unexpectedly.
Positive displacement blowers, used for low-pressure pneumatic conveying and small aeration systems, use diaphragm adjustment. The diaphragm is the flexible part that moves air in and out of the pumping chamber. Adjusting the tension on the diaphragm (usually via a bolt or lever on the side of the blower) changes how much air is moved per cycle. Make small adjustments—turn the bolt 1/4 turn at a time, measure CFM, and repeat until you hit your target. Never adjust the diaphragm beyond the manufacturer’s recommended range, as this will cause leaks or premature failure.
Once you’ve hit your target volume, there are a few final checks to make sure it’s precise and safe. First, verify the efficiency. Go back to your blower’s performance curve and check what the motor draw is at your current CFM and pressure. If it’s within 5% of the curve’s listed efficiency for that point, you’re good. If not, you might need to make a tiny adjustment—efficiency is key, because a blower running at low efficiency is wasting money on power. A client of ours in the grain processing industry saved over $12,000 a year in energy costs just by adjusting their VFD to the optimal point on the performance curve, instead of the default setting the factory had set.
Next, check for system stability. Run the blower at your set volume for 24 hours, if possible, and monitor CFM, pressure, and motor temperature. If the CFM drifts more than 5% during that time, that’s a sign there’s a leak in your piping network, or the blower is wearing out. Leaks are a common culprit—even a small pinhole in a pipe can cause 10% less air flow, forcing you to adjust the blower higher to compensate. If you notice drifting, inspect all piping connections, gaskets, and valves for leaks.
Also, keep a log. This is a tip we give every client when we install a new blower. Write down the date, the adjustment made (Hz for VFD, valve turns, vane position), the CFM and pressure readings, and any notes about process changes that week. That log becomes a reference—next time you need to adjust the blower, you don’t have to start from scratch, and you can spot trends, like if the CFM drops during high humidity (which makes air denser) so you can adjust for that automatically.
Now, what about common mistakes we see that throw off precise adjustment? One big one is ignoring ambient conditions. Air density changes with temperature, humidity, and altitude. Hot, humid air is less dense than cold, dry air, so at the same blower speed or valve setting, you’ll get less CFM on a 90°F summer day than a 40°F winter day. If you live at high altitude, where the air is thinner, you’ll also get less CFM than at sea level. For example, a blower rated for 1,000 CFM at sea level and 60°F will only put out about 880 CFM at 5,000 feet elevation. If you don’t account for that, you’ll adjust the blower too high in the summer, wasting energy, or too low in the winter, causing process issues.
Another mistake is adjusting for peak demand instead of average demand. If your process only needs high air volume for 2 hours a day, but keeps the blower at that setting all day, you’re wasting energy the other 22 hours. The sweet spot is adjusting to your average required CFM, then using a load sensor to automatically adjust when peak demand hits. Most modern blowers can be set up with a PLC (programmable logic controller) that does this automatically, which is the ultimate in precision—no manual adjustment needed, just consistent, optimal air volume for every part of the process.
I mentioned earlier the automotive parts plant that had a blower blowing metal shavings all over the floor. Their maintenance manager called us after his failed attempts to adjust the throttle valve, and we walked him through a VFD upgrade and proper adjustment steps. Within a week, his CFM was within 2% of the required level—enough to clear shavings, but not enough to move small components. He told us later that the energy savings alone paid for the VFD in less than 6 months. That’s the thing about high-pressure blowers: when adjusted precisely, they’re not just functional—they’re a money-saver.
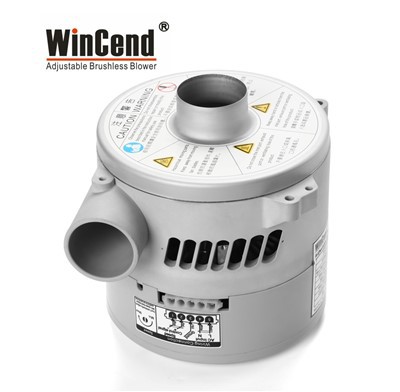
If you’re struggling with your blower’s air volume, don’t risk damaging it with guesswork. Precision adjustment requires knowing your blower, your process, and following safe, step-by-step steps. We offer on-site calibration and adjustment services, plus digital performance tracking for all our blower models, to make sure you get the exact CFM you need, with maximum efficiency. Whether you’re dealing with a decades-old blower or a new installation, our team can help you fine-tune it to perform exactly as your process requires. Don’t let inefficient or improperly adjusted blowers drain your energy costs or cause process downtime—reach out to us today to discuss how we can help you adjust your high-pressure blower precisely.
High-pressure Blower References
- High-Pressure Blower Performance and Application Guide. Air Movement and Control Association International, 2021.
- Centrifugal Blower Control Methods: Efficiency and Operational Considerations. U.S. Department of Energy, Industrial Technologies Program, 2019.
- Pneumatic Conveying Design Guide. Mills, David. Elsevier, 2018.
- Wastewater Aeration System Blower Optimization Manual. Water Environment Federation, 2020.
WinCend Technology (Shen Zhen) Co., Ltd.
As one of the most professional high-pressure blower manufacturers in China, we’re featured by quality products and good price. Please rest assured to wholesale advanced high-pressure blower made in China here from our factory. We also accept customized orders.
Address: 4th Lantian Building Kaitian Science Park Pinghu Longgang Shenzhen China
E-mail: sales@wincend.com
WebSite: https://www.wincend-blower.com/
